How to add new activity in the Activity Log?
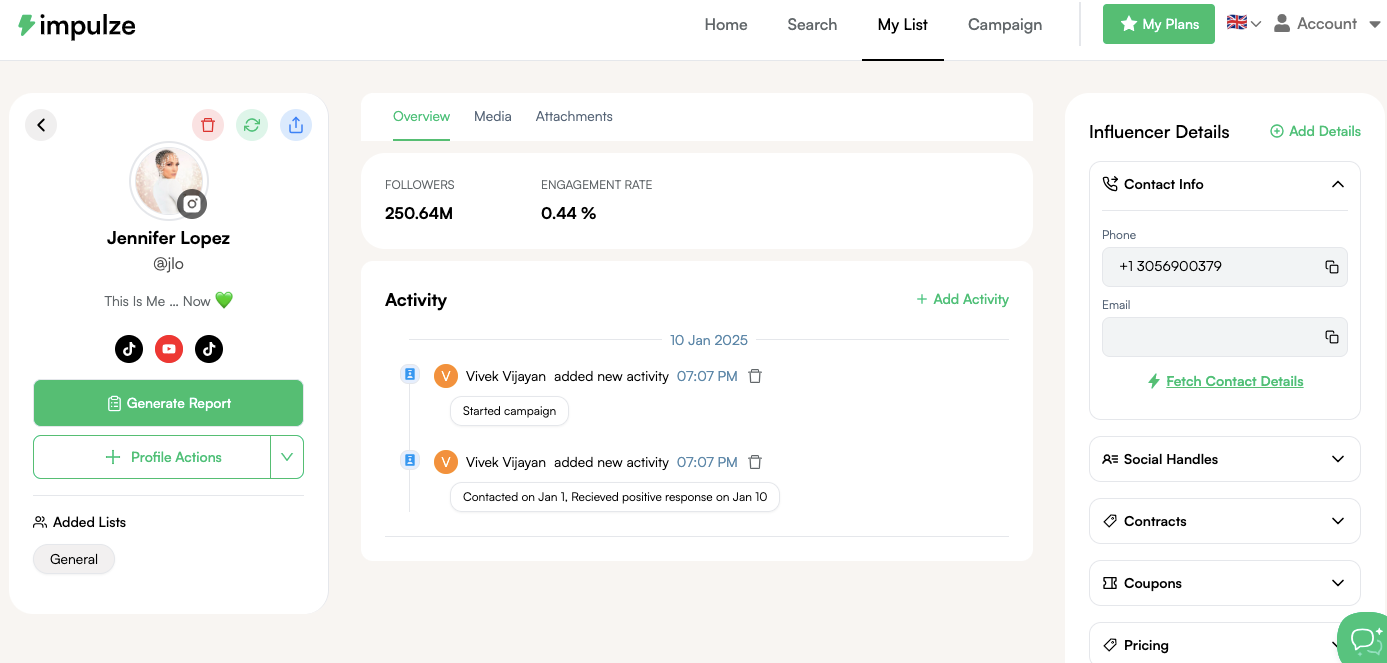
Open any Influencer’s profile dashboard from “My List”. You can see the “Activity” section in the “Overview” category. This is where you can see all the activities related to the profile, whether it is around adding new categories or properties.
Plus, you can add activities on your own to track the influencer relationship.
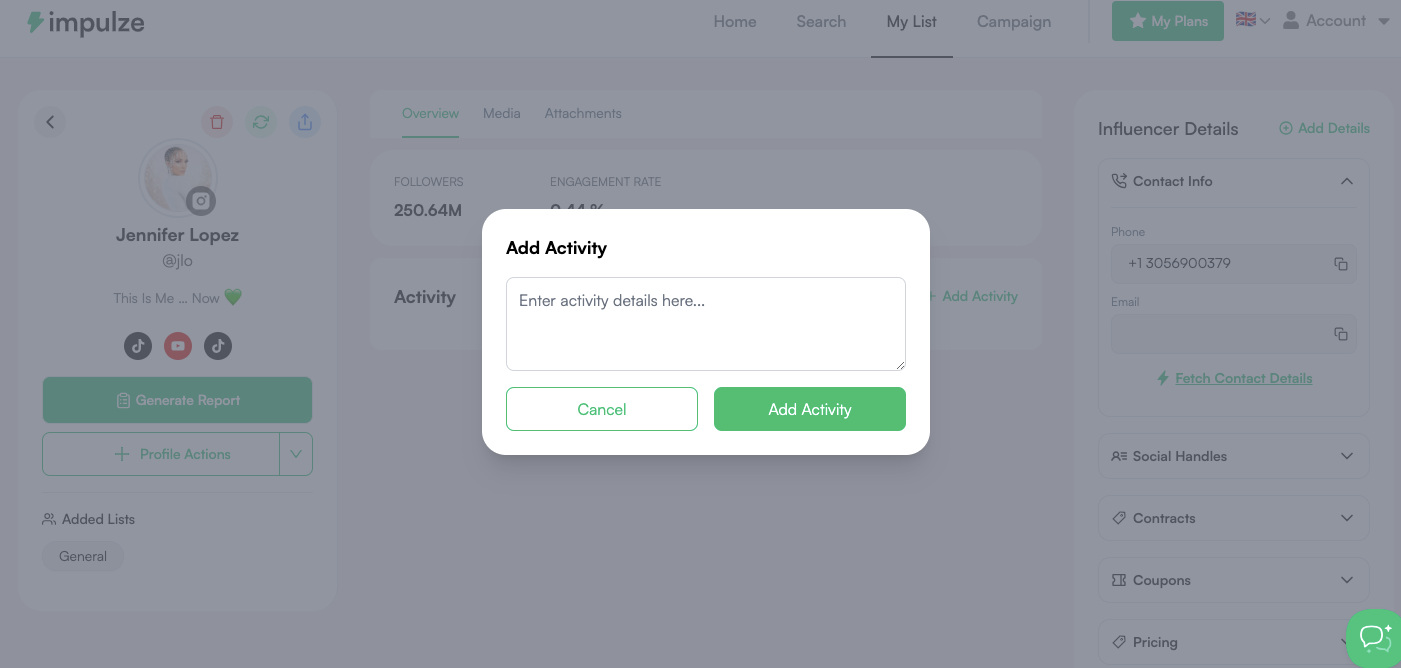
For example, let’s say you contacted them, and they accepted your pitch. It will show the time and date so you have a clear timeline.
You can also add other activities and see the thread on the dashboard.
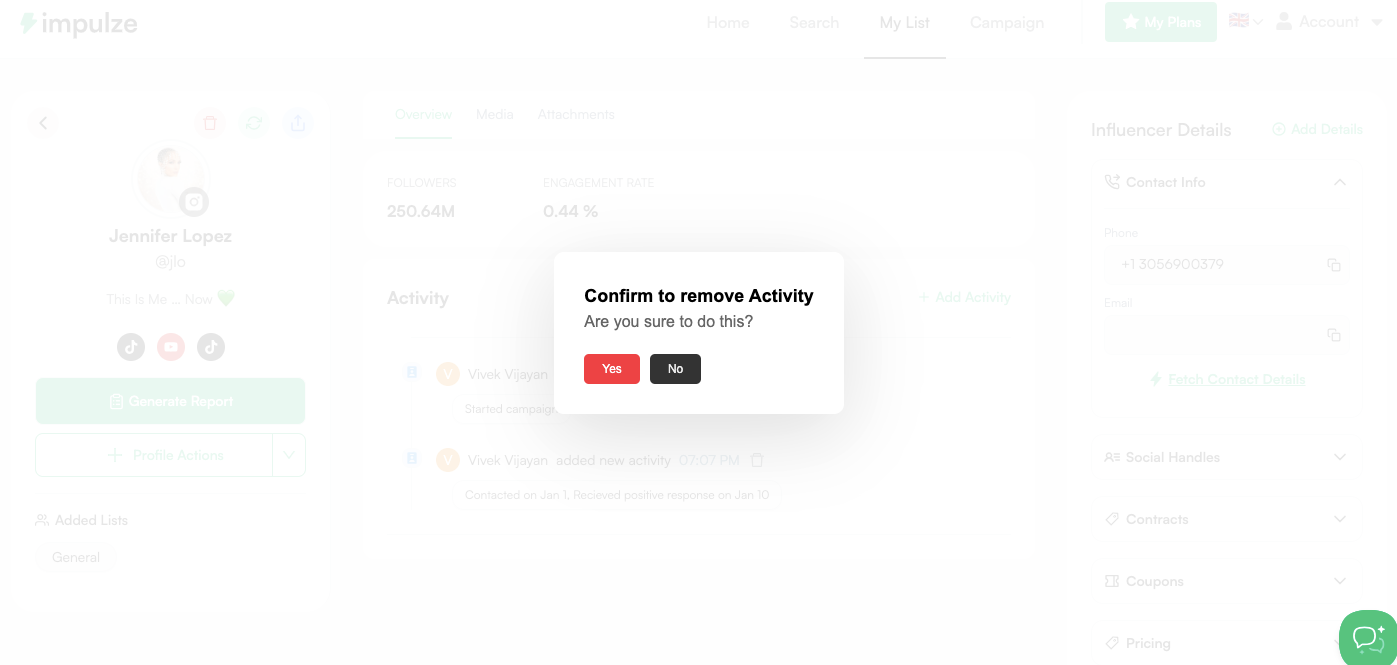
There is also an option to delete any activity you want to remove. Just click on the Delete icon and remove the activity from the timeline.
Keeping all these activities recorded in one place gives you a complete history of how the relationship with the influencer has evolved. It avoids confusion when multiple team members are involved and makes it easy to pick up where someone else left off.
You can also use these notes to prepare for negotiations, track follow-ups, and ensure that no detail is missed across campaigns. Over time, the activity section becomes a living log of every interaction.
Best Practice Tips for Using the Activity Section
- Log every touchpoint: Add notes whenever you send an email, make a call, or receive a reply.
- Use clear labels: Mention if it’s outreach, follow-up, negotiation, or closing to keep things organized.
- Add dates to key milestones: Example: “Agreed on pricing on Sept 8.”
- Encourage team updates: Make sure teammates also add their activities to keep the history complete.
- Review regularly: Check the activity timeline before starting a new campaign or outreach round